Running FAPI - CIBA Conformance Suite
Note
WSO2 Open Banking 3.0.0 supports OpenID Conformance Suite v5.2.0.
The OpenID conformance suite consists of security standards that are defined by the OpenID Foundation (OIDF). It maximizes the security of the APIs, providing robust data flow in Open Banking. An advantage of using OIDF security standards is that the Account Servicing Payment Service Provider (ASPSP) can attest affiliated payment service providers through a self-certification process.
WSO2 Open Banking complies with conformance suites that can be configured by the ASPSP. The following configurations guide you to set up the WSO2 Open Banking Accelerator according to the OpenID Conformance Suite : CIBA profile.
Configure certificates
To run this conformance suite, you need 2 different signing, transport certificates and corresponding Software Statement Assertions (SSAs).
Note
Generate new keystores and exchange certificates by following the Exchanging certificates documentation.
Configure Transport Layer Security (TLS) Parameters
- Open the
<APIM_HOME>/repository/conf/deployment.tomlfile. -
Add the following configurations:
[transport.https.sslHostConfig.properties] ciphers="TLS_DHE_RSA_WITH_AES_128_GCM_SHA256,TLS_ECDHE_RSA_WITH_AES_128_GCM_SHA256,TLS_DHE_RSA_WITH_AES_256_GCM_SHA384,TLS_ECDHE_RSA_WITH_AES_256_GCM_SHA384" -
Add the
PreferredCiphersconfigurations under the[transport.passthru_https.listener.parameters]tag:[transport.passthru_https.listener.parameters] PreferredCiphers = "TLS_DHE_RSA_WITH_AES_128_GCM_SHA256,TLS_ECDHE_RSA_WITH_AES_128_GCM_SHA256,TLS_DHE_RSA_WITH_AES_256_GCM_SHA384,TLS_ECDHE_RSA_WITH_AES_256_GCM_SHA384" -
Restart the API Manager.
Configure applications
The conformance suite has to run from the perspective of 2 clients. Therefore, two applications are required. Follow the steps and create applications:
-
Create 2 applications using Dynamic Client Registration under the same API Consumer/Third Party Provider (TPP).
Note
For the application certificate, use the client certificates (public key) signed by the root CA/Issuer CA (prior acquired or generated). For example,
tpp.com.crt. -
Generate production keys and take note of the consumer key and secret.
Configure well-known endpoint
- Download and extract the well-known-config-resources.zip.
- Go to the
well-known-config-resourcesdirectory. - Copy the
auth.server.info-1.0-SNAPSHOT.jarfile into the<IS_HOME>/repository/components/libdirectory. - Copy the
openid-configuration.jsonfile into the<IS_HOME>/repository/conf/identitydirectory. - Update the values in
openid-configuration.jsonaccording to your setup. - Update the
keystore.jsonfile with the authorization server keys and client application keys generated for both applications. - Copy the
keystore.jsonfile into the<IS_HOME>/repository/conf/identitydirectory. -
Open the
<IS_HOME>repository/resources/conf/templates/repository/conf/tomcat/web.xml.j2file and register the following servlets. Add the following elements before the</webapp>tag.<servlet> <servlet-name>Discovery</servlet-name> <servlet-class>auth.server.info.Discovery</servlet-class> </servlet> <servlet-mapping> <servlet-name>Discovery</servlet-name> <url-pattern>/token/.well-known/openid-configuration</url-pattern> </servlet-mapping> <servlet> <servlet-name>Keystore</servlet-name> <servlet-class>auth.server.info.Keystore</servlet-class> </servlet> <servlet-mapping> <servlet-name>Keystore</servlet-name> <url-pattern>/token/keystore</url-pattern> </servlet-mapping> -
Restart the Identity Server and API Manager.
-
Go to the following links and see the changes:
https://<IS_HOST>:9446/oauth2/token/.well-known/openid-configurationhttps://<IS_HOST>:9446/oauth2/token/keystore
Set up CIBA automated approval endpoint
The conformance suite requires a custom endpoint to mock the user approval process in the CIBA flow. To achieve this, a simple flask server can be used.
Tip
A sample implementation is available here.
Run the conformance suite
Before you begin:
Configure conformance suite
This section describes how to build the conformance suite to identify the configuration and application settings.
-
Download the sample JSON configuration file available here.
- Update the values according to the applications you created.
- The
kidvalue should be the specific kid value of the corresponding signing certificate in the JWKS. - The
ciba_approval_endpointvalue should be the custom endpoint configured in the Set up CIBA automated approval endpoint section.
-
Fill in the following values in the
Serversection:Key Value discoveryURL https://<IS_HOST>:9446/oauth2/token/.well-known/openid-configuration -
Configure the resource section with the following parameters.
Key Value resourceUrl Accounts API resource URL as displayed in the API Publisher.
For examplehttps://192.168.8.181:8243/open-banking/v3.1/aisp/accounts/abc -
Configure the
clientandmtlssections as follows:Note
The
clientandmtlstags correspond to the first application, whileclient2andmtls2correspond
to the second application. -
Fill in the following parameters of
clientandclient2:Key Value client_id The client ID of the application scope openid accountsjwks.keys The respective signing JWK set hint_type login_hinthint_value [email protected] -
Fill in the following parameters of
mtlsandmtls2:Key Value cert Content of the .pemfile of the transport certificatekey Content of .keyfile of the transport certificateca Content of rootCA.crtfile of the transport certificate
Start the suite locally
Info
For more information on starting the suite locally, go to OpenID Foundation conformance-suite build and run.
-
Clone https://gitlab.com/openid/conformance-suite using the command below and build the latest version. If you encounter a permission denied error during cloning, use HTTP cloning instead of SSH.
git clone https://gitlab.com/openid/conformance-suite.git -
Stop all the running docker containers and ensure a clean state. The following command shows the container status.
docker ps -
Execute the following commands to remove any local files.
git clean -x -f -dgit reset --hard HEAD -
Run without installing JDK and Maven.
MAVEN_CACHE=./m2 docker-compose -f builder-compose.yml run builderIf you have a local Java development environment:
mvn clean package -
Execute the following commands to build the docker image.
docker-compose build -
Start the docker container.
docker-compose up -
The conformance suite is now locally available at
https://localhost:8443/.
Start the suite online
Info
If you're running WSO2 Open Banking in a local setup you are not able to use the online suite.
- Go to https://www.certification.openid.net/ and start the conformance suite online.
Run tests
- Use a tool and convert the private key (tpp.com.key) to a JWK. Use this JWK to update the value of the keys array element in the JSON configuration.
- Log in to the test suite.
- Select the Open Banking test plan and client authentication type as follows:
- Test plan:
FAPI-CIBA-ID1: Authorization server test - Client Authentication Type
private_key_jwtormtls - CIBA Mode:
poll - FAPI Profile:
plain_fapi - Client Registration Type:
static_client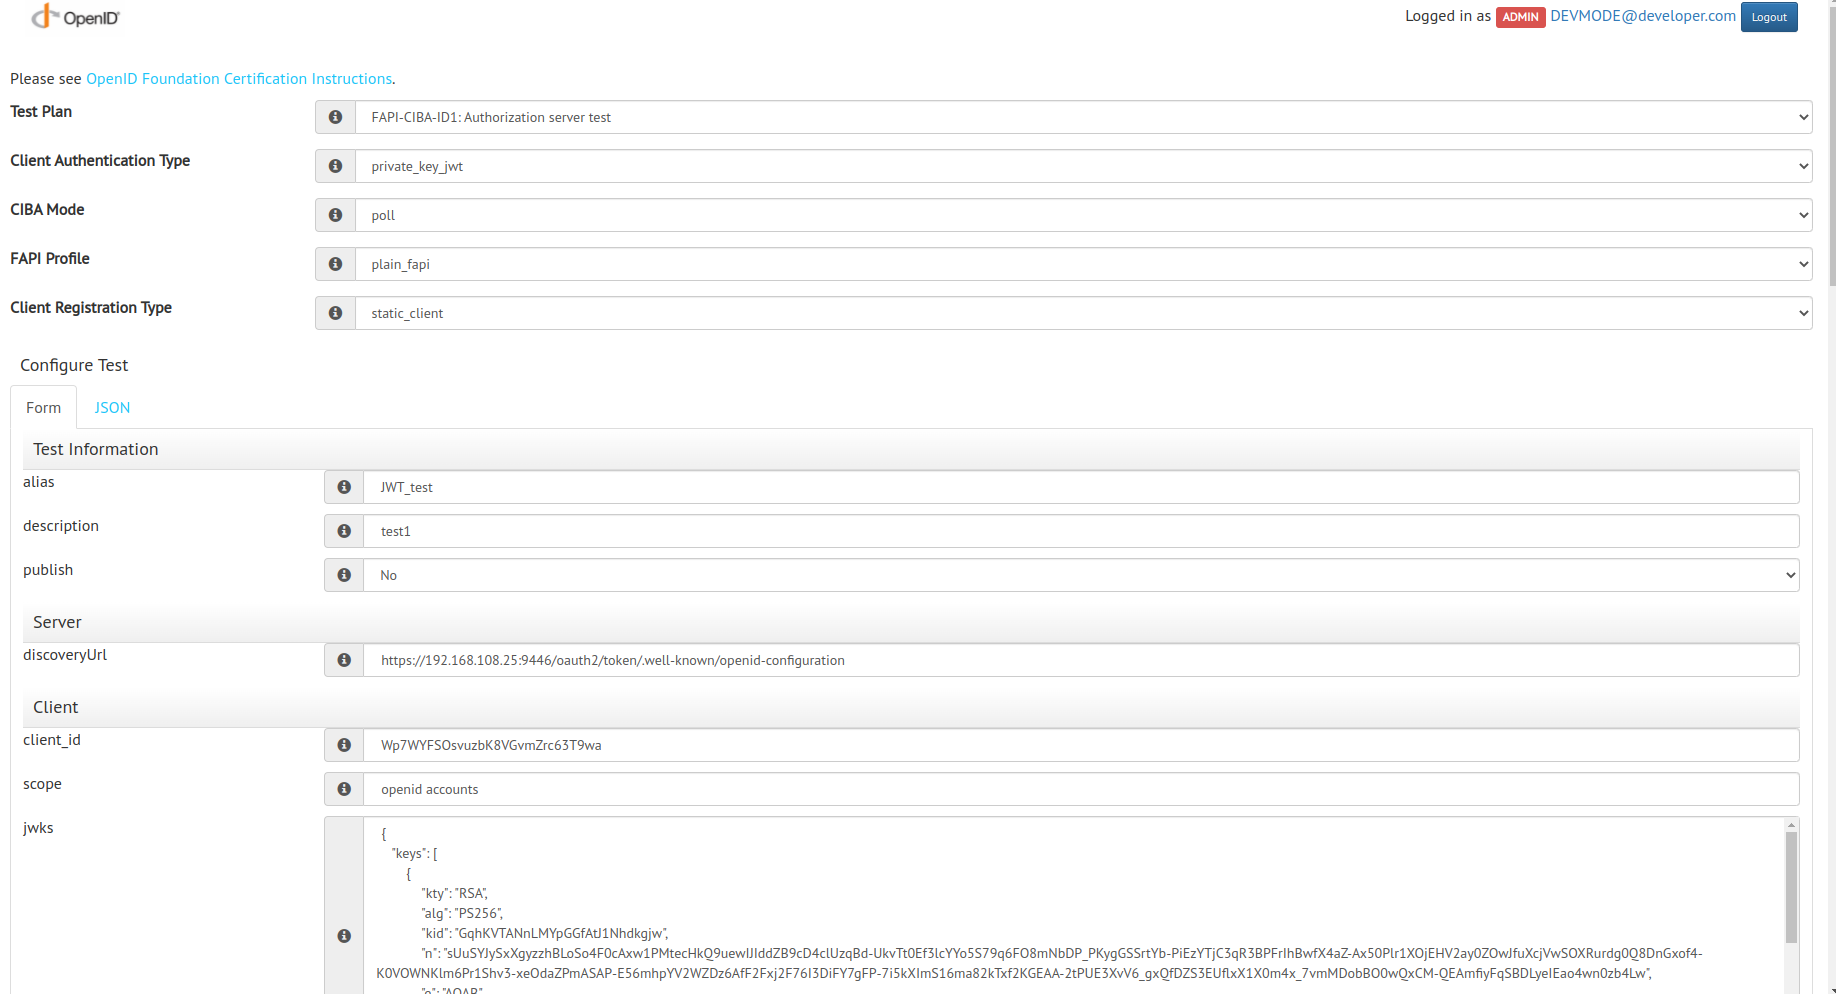
- Test plan:
- Copy the content in the modified JSON configuration file and paste it into the JSON tab.
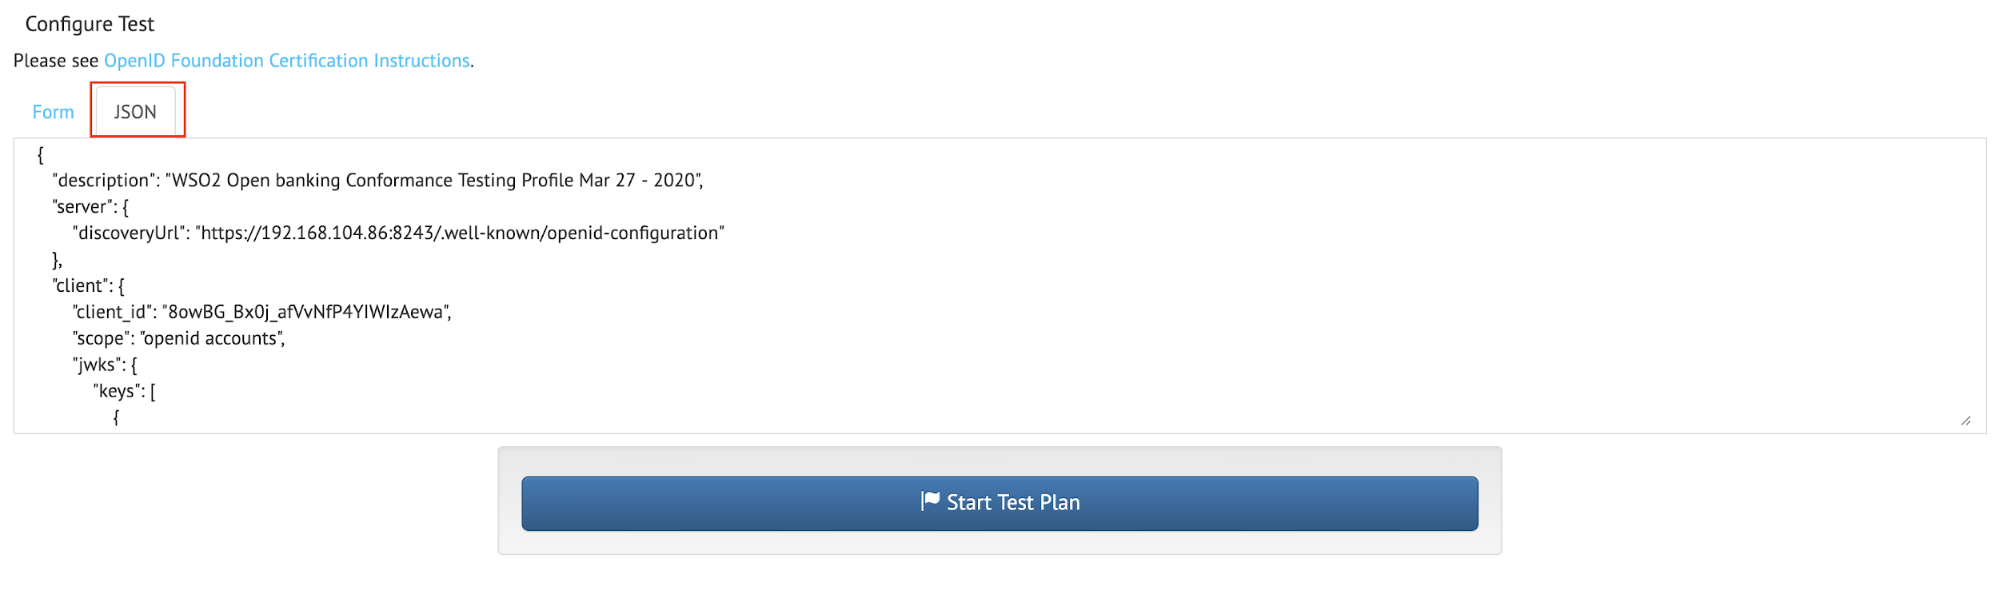
- Click Start Test Plan.
- Run each given test in sequence.
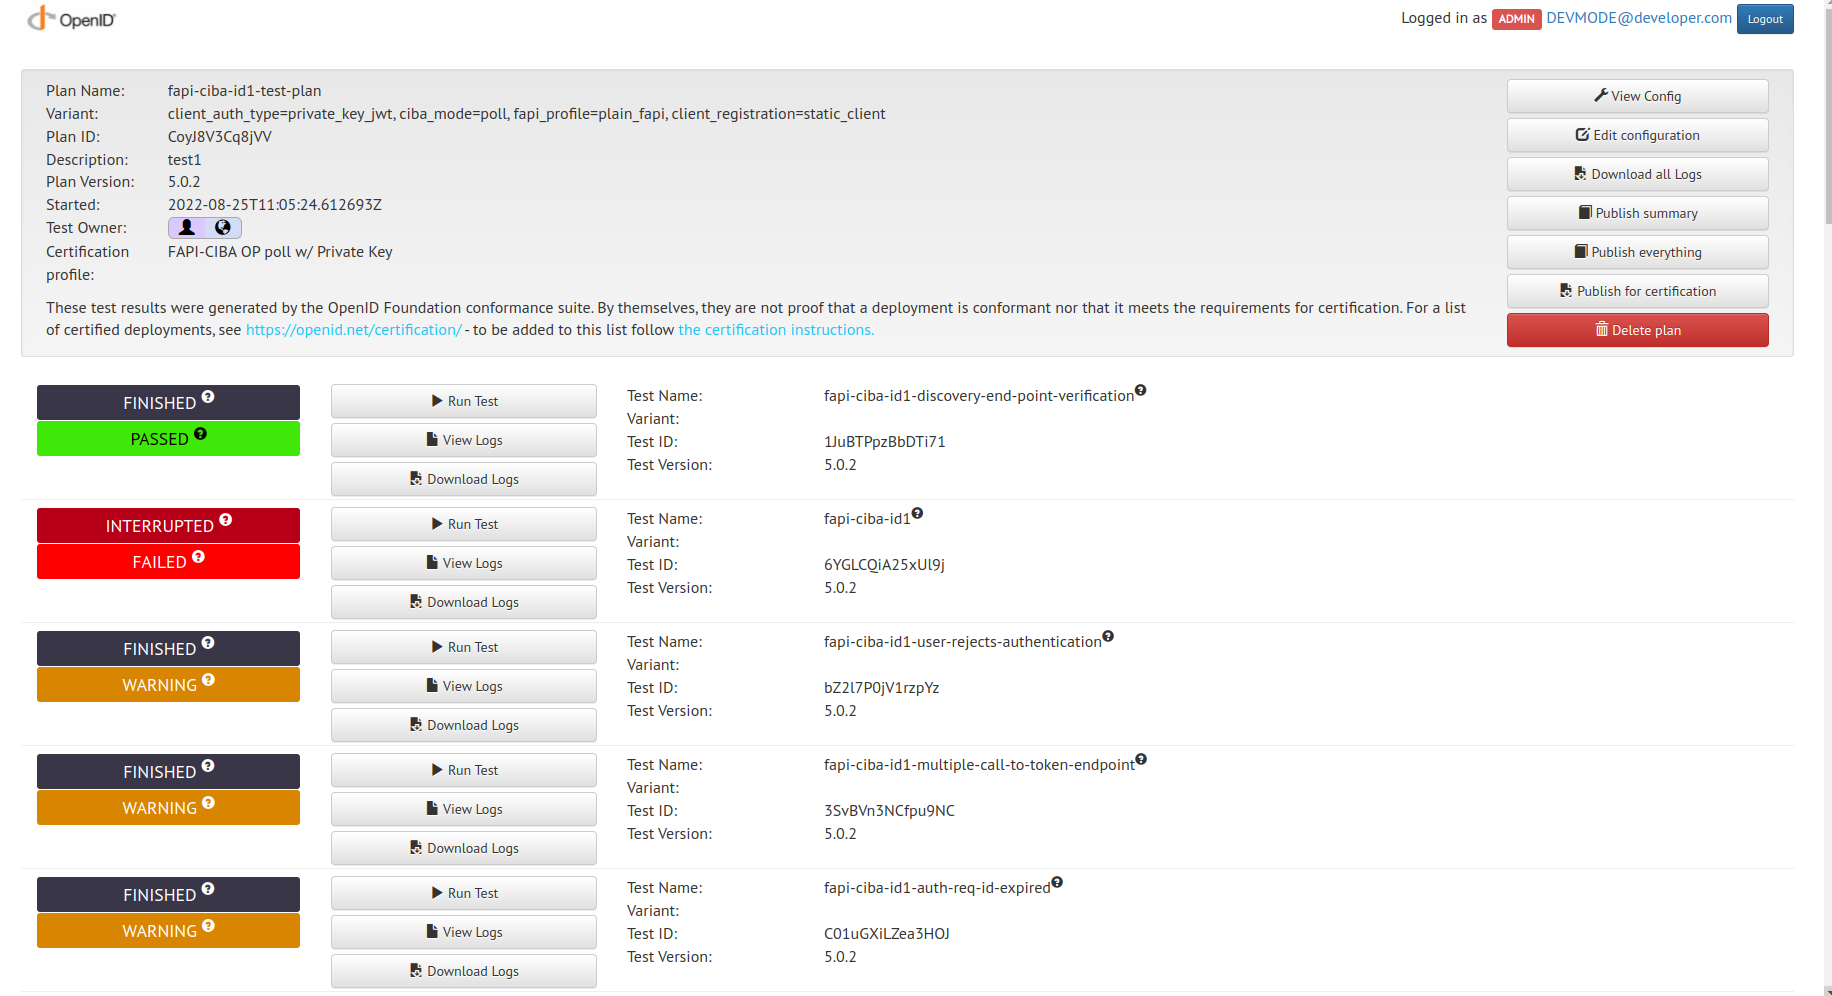
- Refer to https://openid.net/certification/instructions/ for more information.