Configure WSO2 Financial Service Key Manager
Configure IS as Key Manager
Configure WSO2 Identity Server 7.1.0
-
Add following configurations in the
<IS_HOME>/repository/conf/deployment.tomlfile.[[event_listener]] id = "token_revocation" type = "org.wso2.carbon.identity.core.handler.AbstractIdentityHandler" name = "org.wso2.is.notification.ApimOauthEventInterceptor" order = 1 [event_listener.properties] notification_endpoint = "https://<APIM_HOST>:<APIM_PORT>/internal/data/v1/notify" username = "${admin.username}" password = "${admin.password}" 'header.X-WSO2-KEY-MANAGER' = "WSO2-IS" -
Download notification.event.handlers-2.0.5.jar and add it to
<IS_HOME>/repository/components/dropinsfolder. -
Restart the IS server
Configure Key Manager in WSO2 API Manager
-
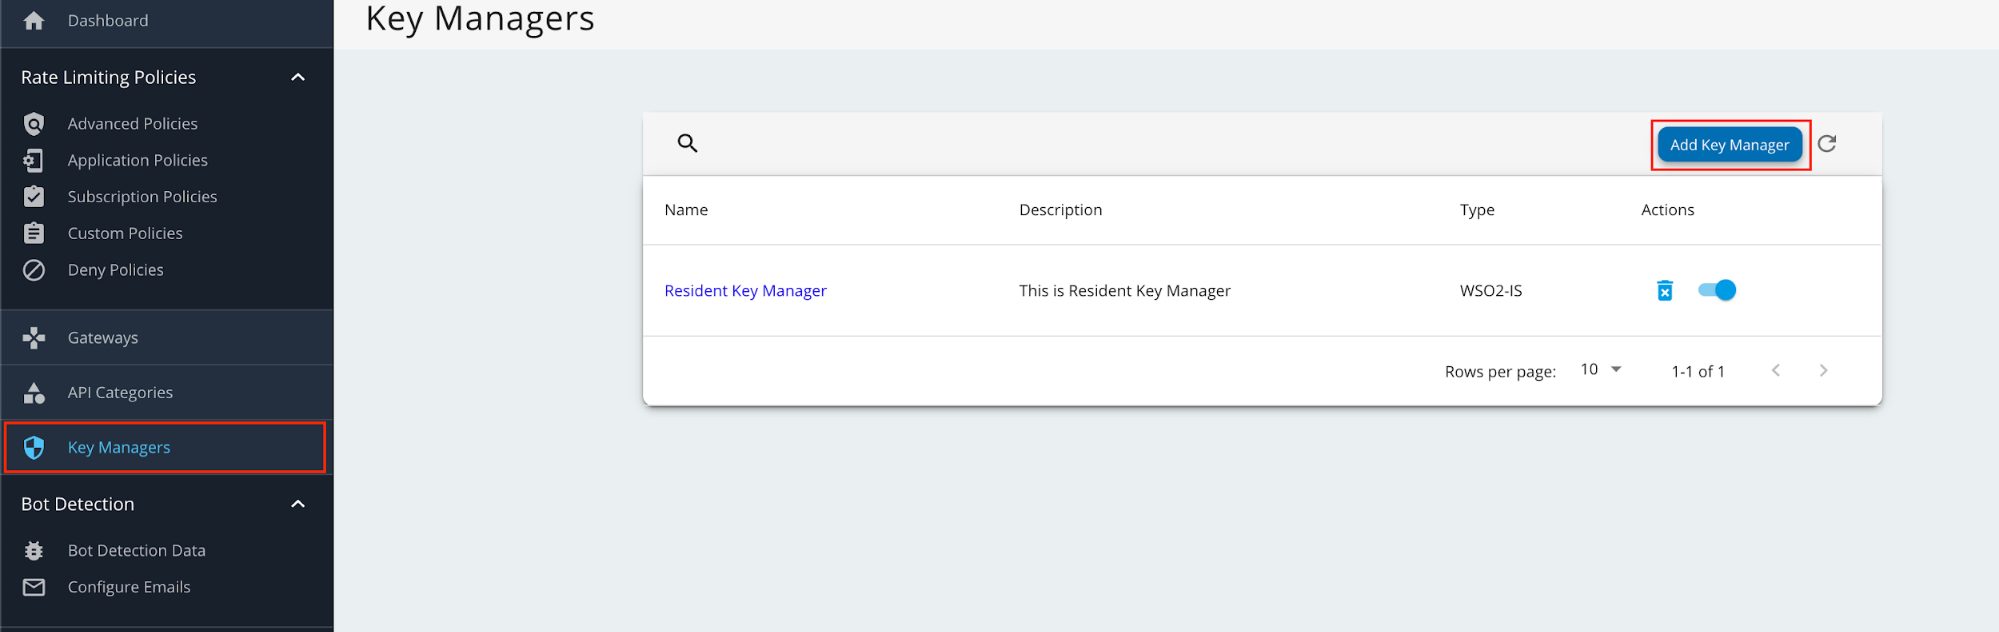
Sign in to the Admin Portal of API Manager at
https://<APIM_HOSTNAME>:9443/adminusing admin credentials. -
Go to Key Managers on the left main menu. Click on Add Key Manager button.
-
Enter a Name and Display Name, and select fsKeyManager as the Key Manager Type.

-
Enter the Well-known-url and Issuer as below.
Field Value Well-known-url https://<IS_HOSTNAME>:9446/oauth2/token/.well-known/openid-configurationIssuer https://<IS_HOSTNAME>:9446/oauth2/token -
Under the Key Manager Endpoints section, provide the following values:
Note
You can use
https://<IS_HOSTNAME>:9446/oauth2/token/.well-known/openid-configurationas the Well-known URL, and click on Import to populate most of the fields mentioned below, Grant types, and the Certificates section.If the Import button is used, verify all the auto imported values with the ones mentioned below.
Configuration Values Issuer https://<IS_HOSTNAME>:9446/oauth2/tokenClient Registration Endpoint https://<IS_HOSTNAME>:9446/api/identity/oauth2/dcr/v1.1/registerIntrospection Endpoint https://<IS_HOSTNAME>:9446/oauth2/introspectToken Endpoint https://<IS_HOSTNAME>:9446/oauth2/tokenDisplay Token Endpoint https://<IS_HOSTNAME>:9446/oauth2/tokenRevoke Endpoint https://<IS_HOSTNAME>:9446/oauth2/revokeDisplay Revoke Endpoint https://<IS_HOSTNAME>:9446/oauth2/revokeUserInfo Endpoint https://<IS_HOSTNAME>:9446/scim2/MeAuthorize Endpoint https://<IS_HOSTNAME>:9446/oauth2/authorizeScope Management Endpoint https://<IS_HOSTNAME>:9446/api/identity/oauth2/v1.0/scopes -
Under Grant types, provide all the following:
- Client_credentials
- Refresh_token
- Authorization_code
- urn:ietf:params:oauth:grant-type:jwt-bearer
-
Under the Certificates section, select JWKS. Enter
https://<IS_HOSTNAME>:9446/oauth2/jwksas the URL. -
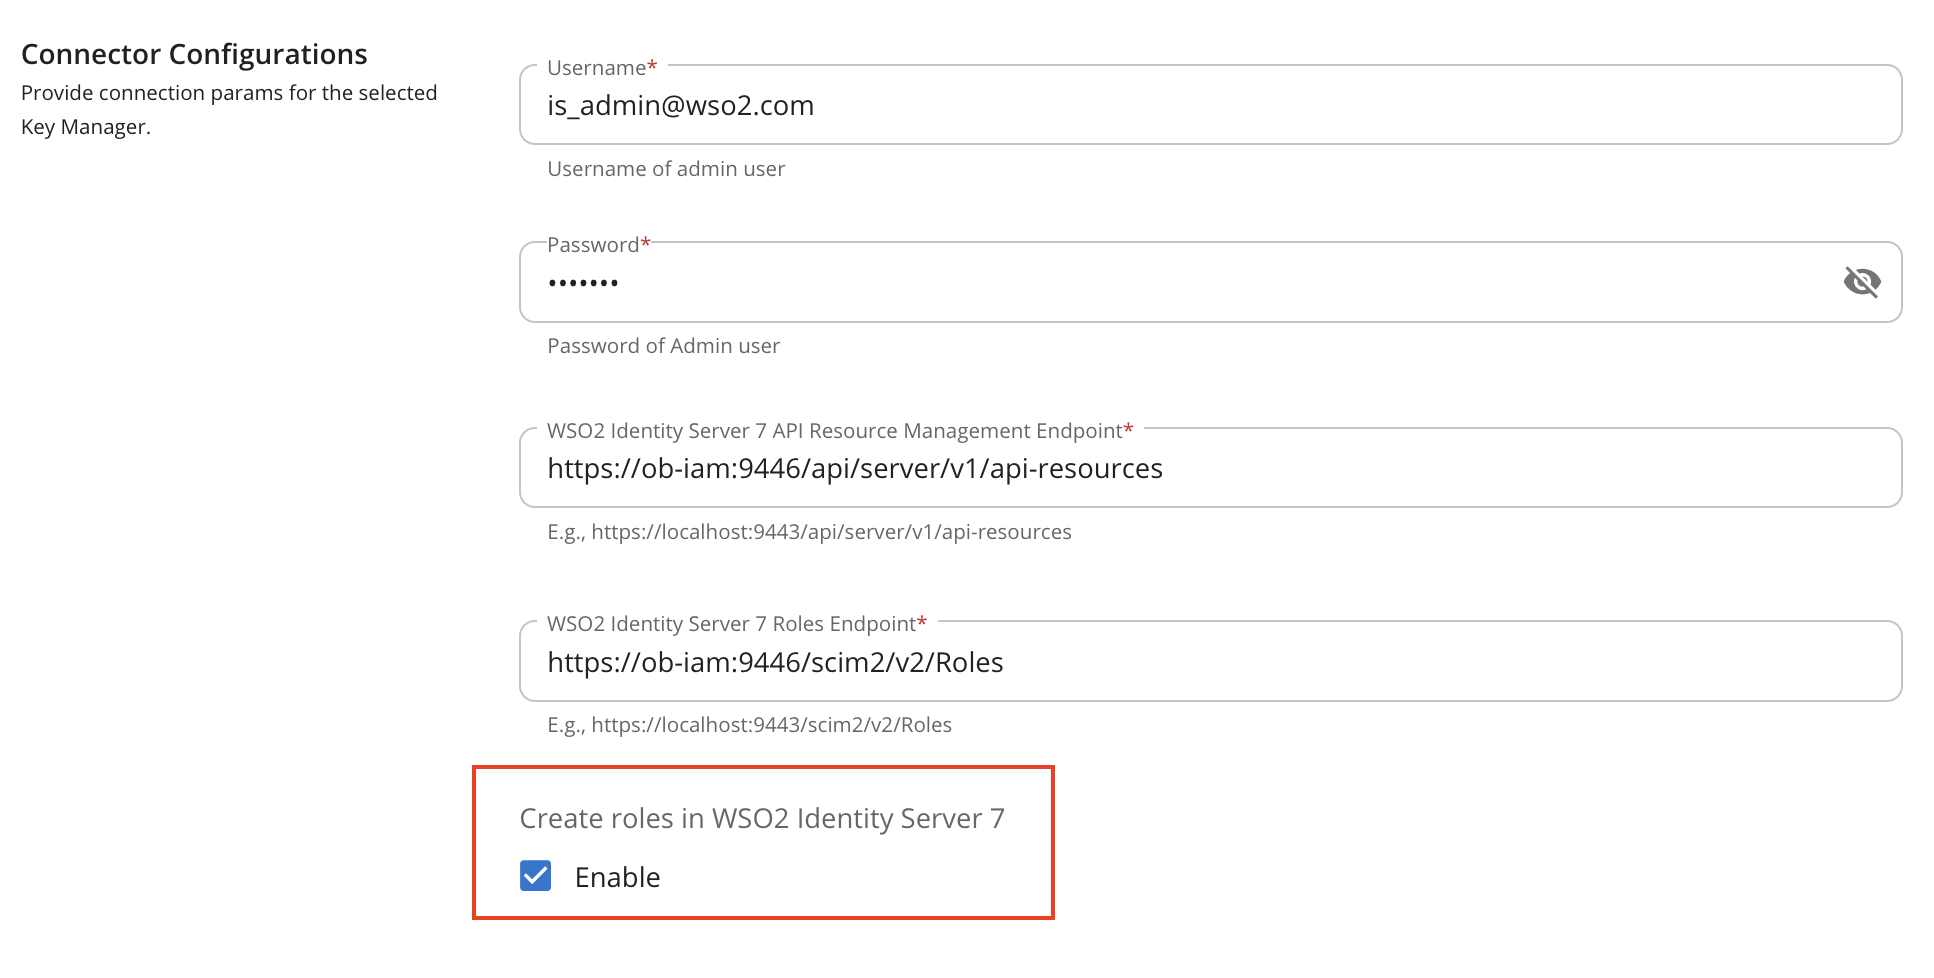
Under Connector Configurations, provide the following values:
Configuration Values Username Authorization server admin username Password Authorization server admin password WSO2 Identity Server 7 API Resource Management Endpoint https://<IS_HOSTNAME>:9446/api/server/v1/api-resourcesWSO2 Identity Server 7 Roles Endpoint https://<IS_HOSTNAME>:9446/scim2/v2/Roles -
Enable the Role creation is WSO2 Identity Server 7 as by ticking as below.
-
Set Key Manager Permission to Public.

-
Under Advanced Configuration, provide the following values:
Configuration Values Token Generation Tick (Mandatory) Out Of Band Provisioning Tick (Mandatory) Oauth App Creation Tick (Mandatory) Token Validation Method Self Validate JWT Token Handling Options (Optional) JWT -
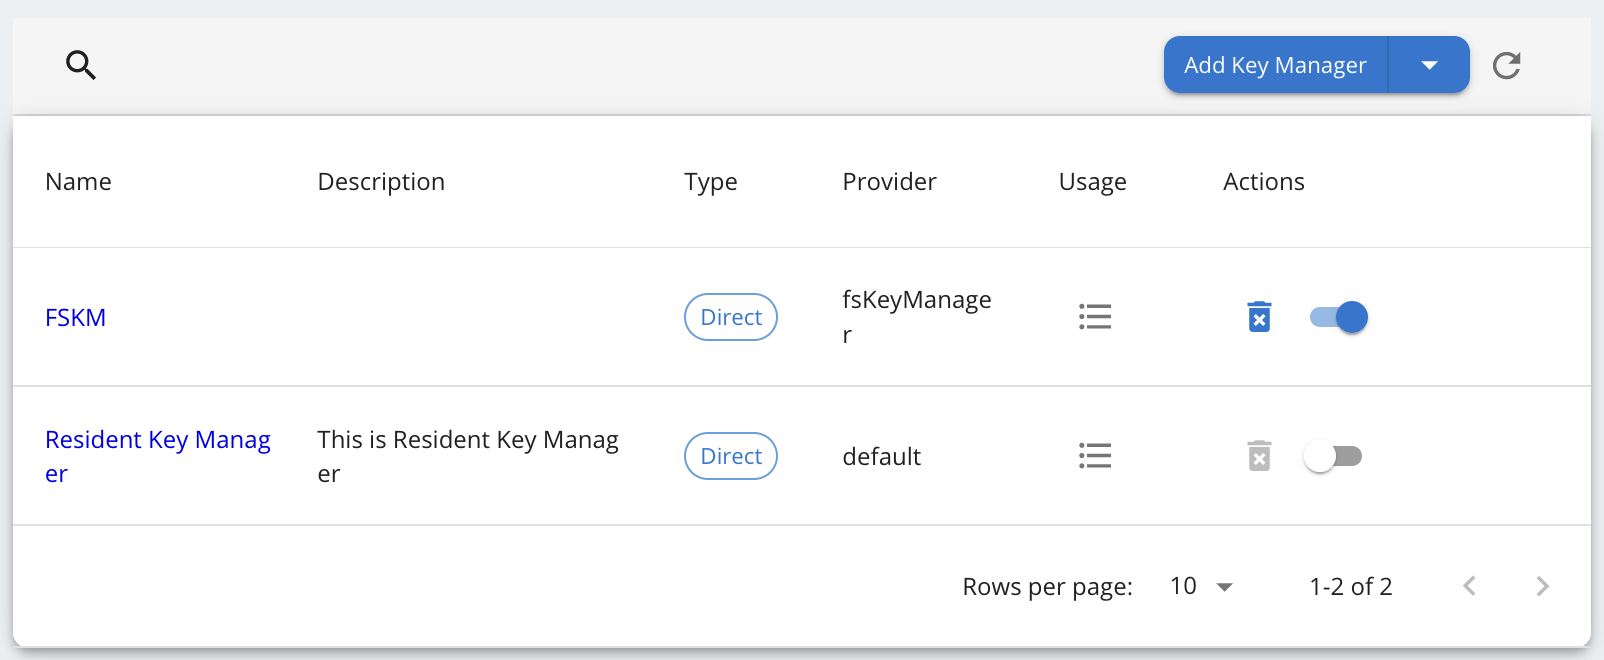
Click on Add button to create the Key Manager. Key Manager will be displayed as below.
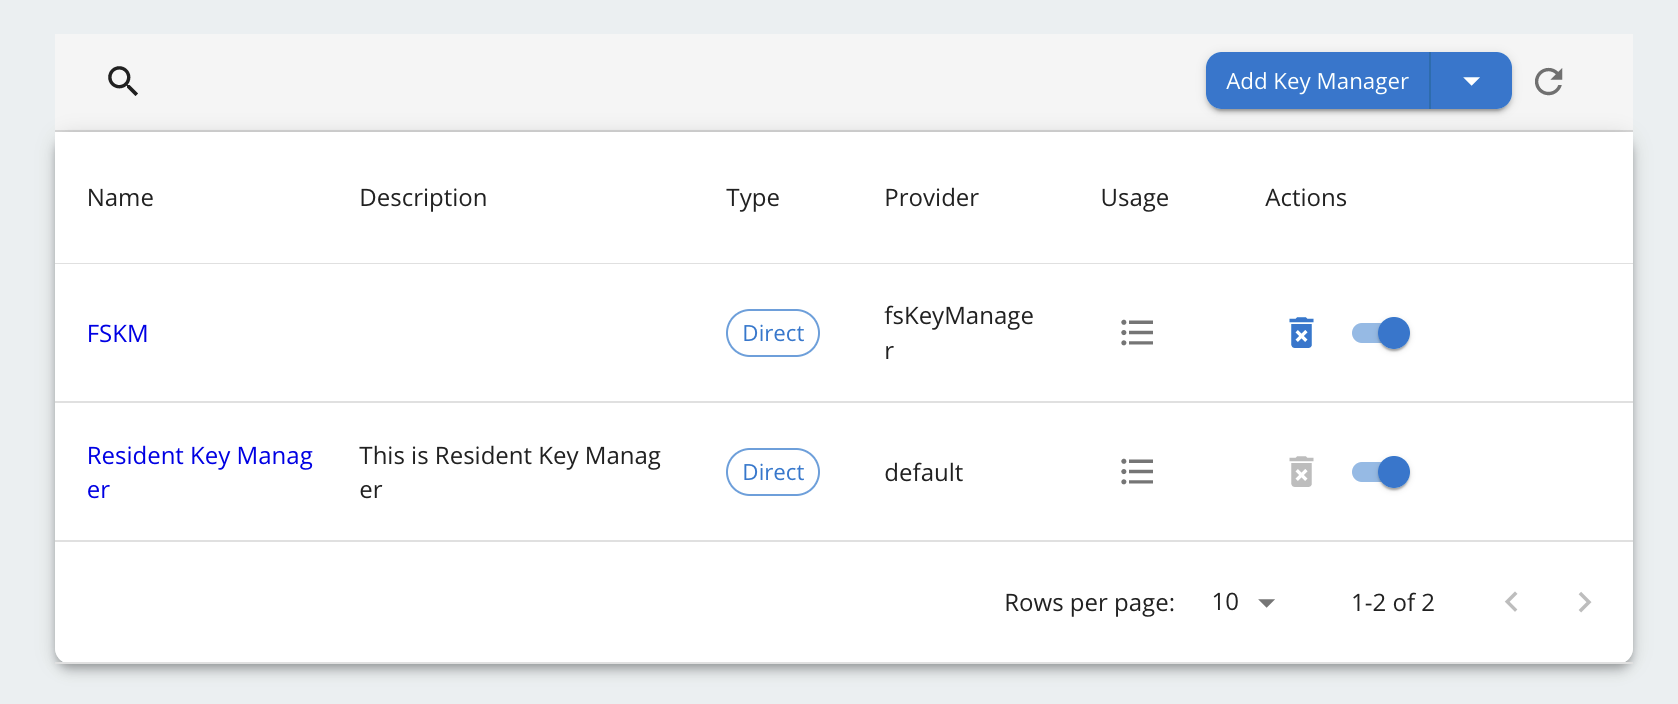
-
Disable the Resident Key Manager.