Try out CIBA with a sample mobile application
The CIBA flow requires a mobile application to interact with the end-user (bank customer) for backchannel authentication. Ideally, this application should be implemented by the bank. If you wish to develop this application with React Native, the auth-push-react-native SDK is available. This SDK facilitates essential Identity Server related requests.
To download the auth-push-react-native SDK, contact us via WSO2 Online Support System, if you have an active WSO2 Open Banking subscription
Note
If you don't have a WSO2 Open Banking subscription, contact us for more information.
WSO2 Open Banking provides a sample React Native application and this section explains how to set it up for a CIBA flow.
Set up React Native mobile application
- Clone the ciba-sample-app GitHub repository.
- A React Native project is available in the following path:
/WSO2VerifyApp - Upgrade Node.js and npm to the latest versions.
- Enable USB debugging in your device and set up your Linux machine.
-
Go to the React Native documentation and follow steps 1 and 2.
-
In addition to the above, install adb:
sudo apt install adb
-
-
Setup Android SDK:
- If you have installed Android Studio, you have already set up the Android SDK.
- Edit the
.bashrcfile and set the environment variables as follows:sudo gedit ~/.bashrc - According to your installation, add the following content before
export PATHand save:ANDROID_SDK_ROOT="/home/user/Android/Sdk" PATH=$PATH:$ANDROID_SDK_ROOT/tools PATH=$PATH:$ANDROID_SDK_ROOT/platform-tools PATH=$PATH:$ANDROID_SDK_ROOT/build-tools/31.0.0 export ANDROID_SDK_ROOT
-
Install React Native CLI:
sudo npm install -g react-native-cli
Modify the existing application
-
Create an FCM project at Firebase Console and create an Android application under that. You can use your own project and package names. When configuring the Push Authenticator IDP, use the Server Key of this project.
For example: Project name:
wso2-verify
Package name:com.wso2verifyapp- Download the
google-service.jsonfile from your project and replace the existing file of the WSO2 application (/WSO2VerifyApp/android/app/google-services.json).
- Download the
-
If you run the application now, you will get the following error:
'@wso2/auth-push-react-native' module is not in the npm registry.- To fix this issue, build the SDK manually and add it to the project. This happens because the Identity Server has not yet pushed their SDK to the npm registry.
-
Go to the location where you downloaded the
auth-push-react-nativedirectory.- Open a terminal from the
ciba-mobile-sdk/sdk/packagedirectory. -
Execute the following:
npm installnpm run build
- Open a terminal from the
-
Create a new directory named
packagesin the app project root directory (/WSO2VerifyApp). -
Create a new directory named
auth-push-react-nativeinside thepackagesdirectory and the copy the above package content to this new directory.Tip
You may remove the
srcdirectory as it is not required once the SDK is built. -
Open a terminal from
/WSO2VerifyApp/packagesand run:npm install @wso2/auth-push-react-native -
Even though you run the mobile app, it won’t communicate with the Identity Server until the following changes are performed. They will enable communication between the React Native app and the Identity Server.
-
Update the
/WSO2VerifyApp/android/app/src/main/res/xml/network_security_config.xmlfile with your Identity Server's IP address.<domain includeSubdomains="true">192.168.8.193</domain> -
Copy the public cert (
wso2carbon.pem) extracted from the new keystore of the Identity Server to the
/WSO2VerifyApp/android/app/src/main/res/rawdirectory.
-
Run React Native app in an Android device
-
Run the React Native app on the mobile device in debug mode. For instructions, follow React Native documentation.
-
Go to the project root directory at
/ciba-sample-app/WSO2VerifyAppand run:npm install -
Run the command below to build and run the app (both metro bundler and app will start):
npx react-native start && react-native run-android
-
-
If the build is successful, but an error is generated when the app is loading, indicating that the file watchers are limited:
echo fs.inotify.max_user_watches=524288 | sudo tee -a /etc/sysctl.conf && sudo sysctl -pcat /proc/sys/fs/inotify/max_user_watchesIssue the above commands and rerun the app.
Device registration flow with the mobile app
Note
To try out this example, connect both Identity Server and the mobile phone to the same network.
-
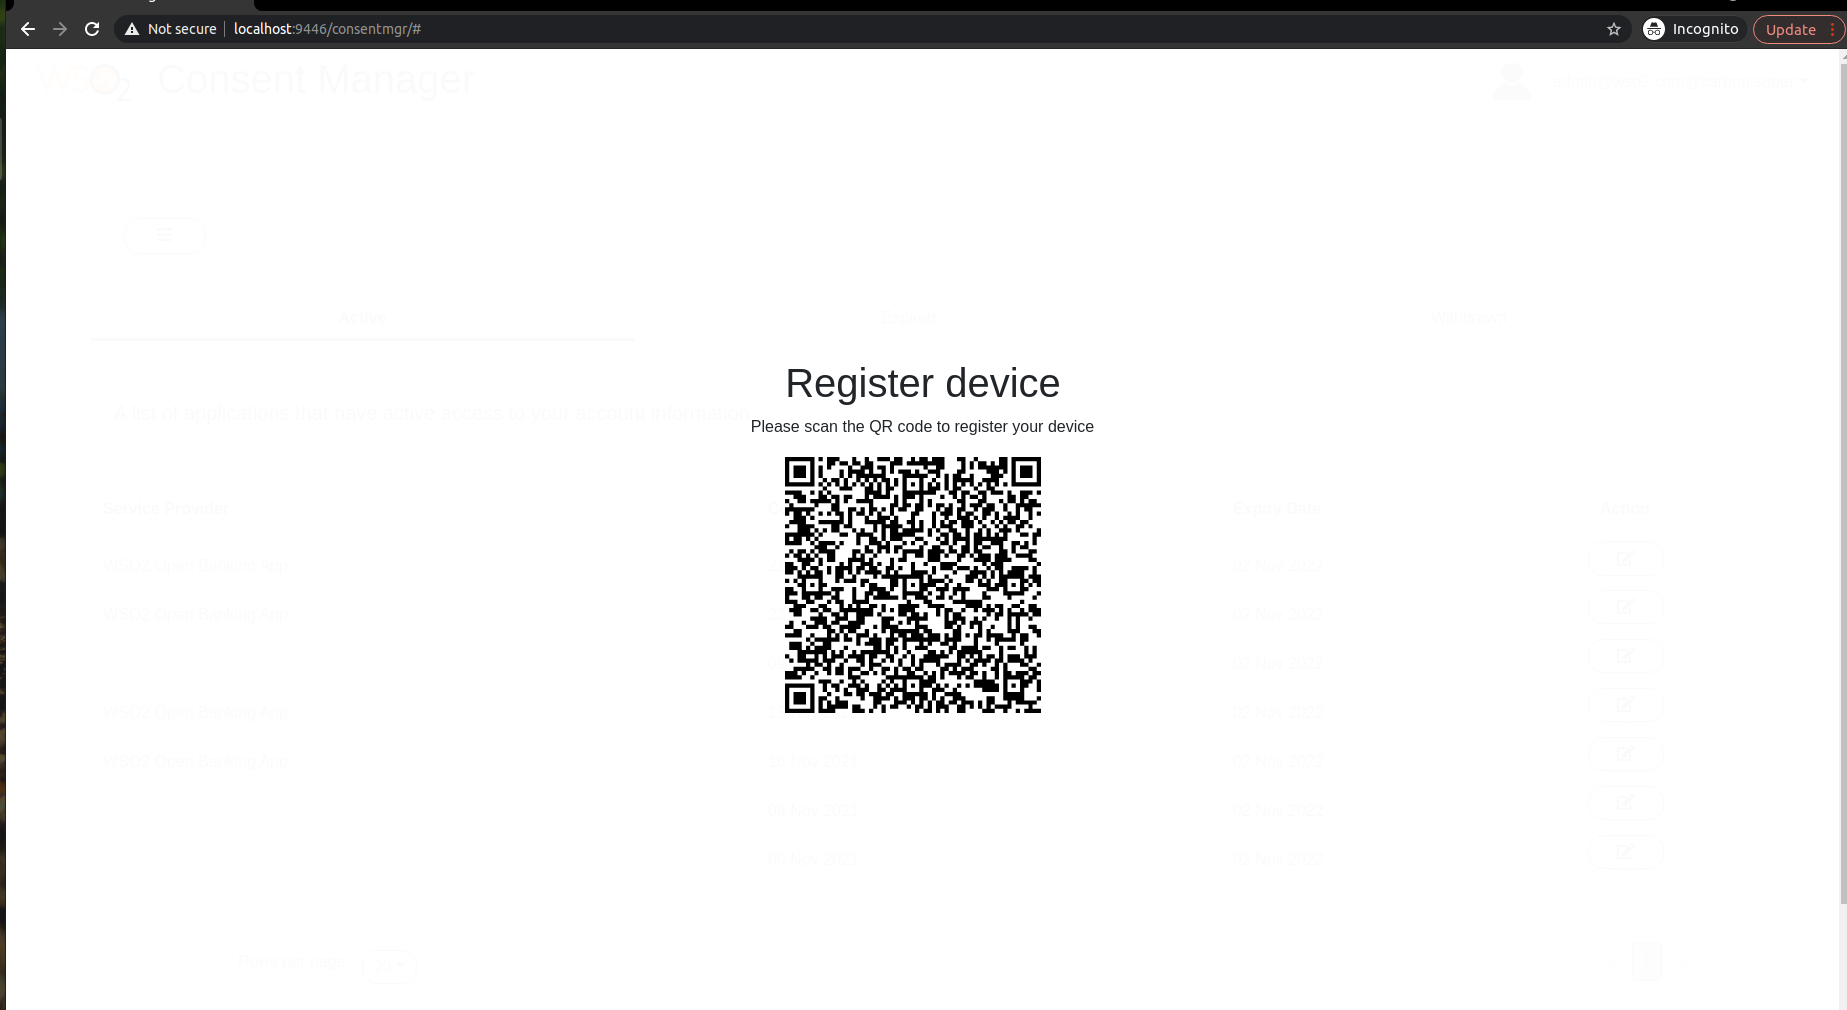
Get the QR code to scan and register your app. The bank will invoke the following endpoint in the Identity Server with basic authentication.
GET : https://192.168.8.193:9446/api/openbaking/ciba/push-auth/discovery-data Headers - Authorization : basic <Base 64 encoded admin credentials>{ "did":"014e502a-cdff-43bd-9705-ad0ceb6dd351", "un":"[email protected]", "td":"carbon.super", "hst":"https://192.168.8.193:9446", "bp":"/t/carbon.super/api/users/v1/me", "re":"/push-auth/devices", "ae":"/push-auth/authenticate", "rde":"/push-auth/devices/remove", "chg":"82e33587-ba35-440e-8f73-d3542a859da8" }Use a QR code generator and add this JSON discovery response as the content of the QR code.
Click here to see a sample implementation of the above functionality in Open Banking Consent Manager Portal
You can try out this without generating a QR code by yourself.

-
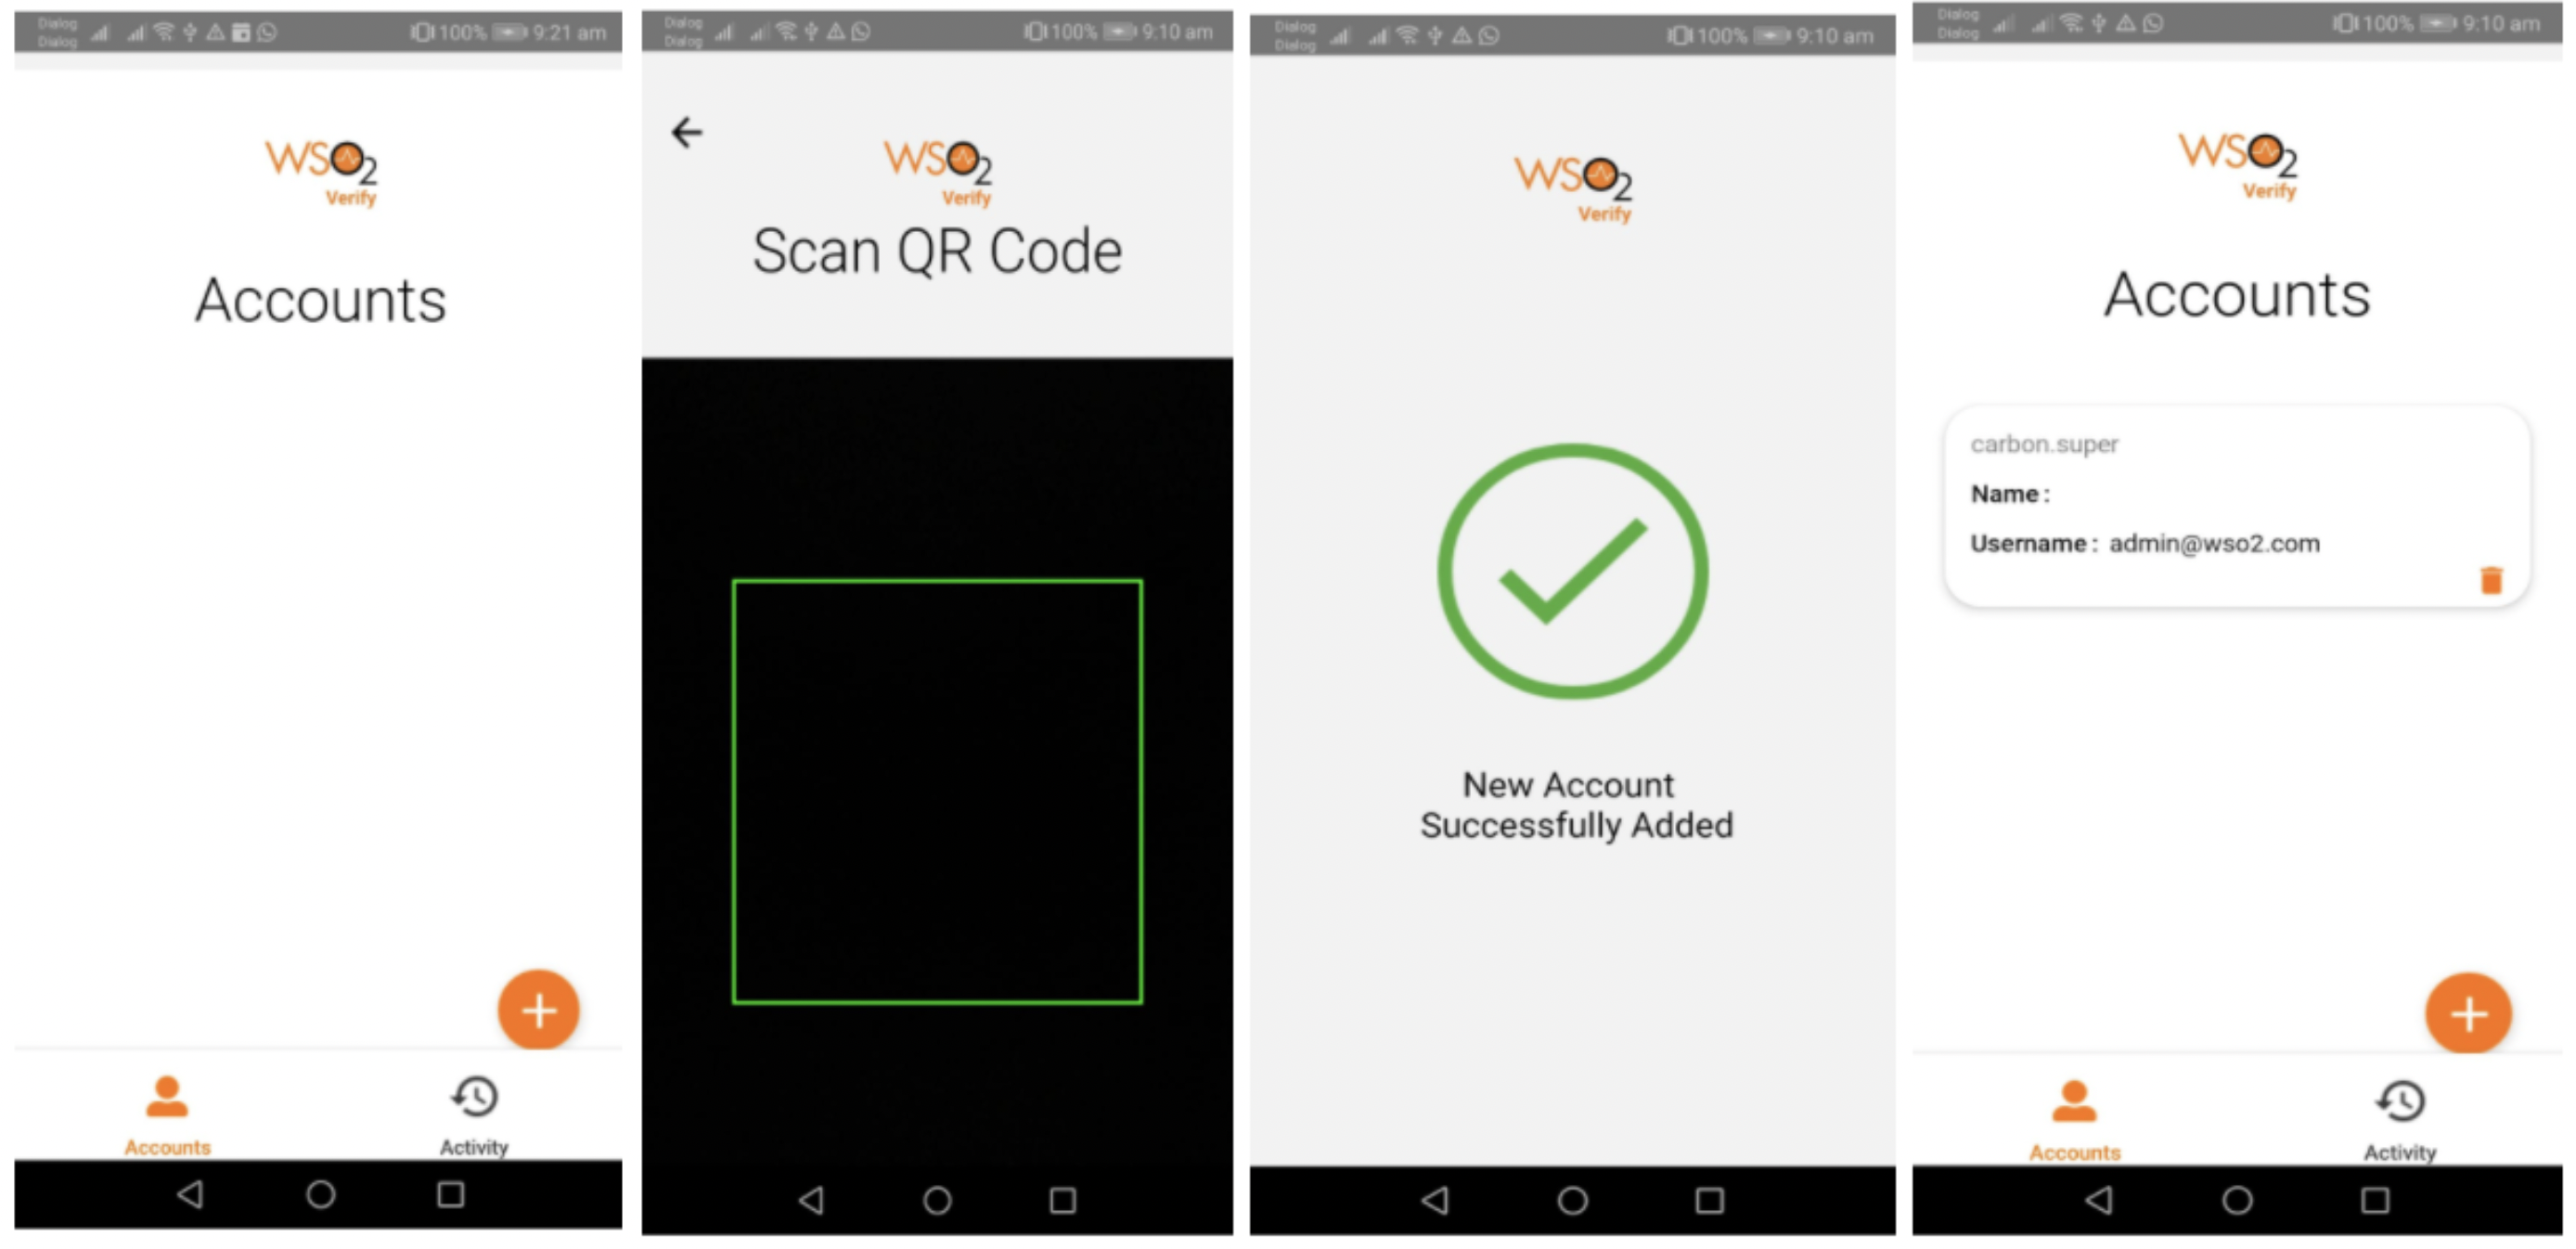
Use the mobile app and register it as a device by scanning the QR code. The app is connected to the configured Google FCM project (a firebase Android cloud project) during the installation. An FCM token is generated inside the device as a unique identifier and registered with the Firebase cloud project as well.
Note
The generated FCM token needs to be used as the pushId when registering the device with WSO2 Identity Server.
-
Open the mobile app, click the (+) button to scan the QR code and register your device in the Identity Server.
The registration request body contains the following:
POST: https://192.168.8.193:9446/t/carbon.super/api/users/v1/me/push-auth/devices

headers:
{
   Accept: "application/json",
   Content-Type: "application/json"
}

request body:
{
   "deviceld":"80265a63-5f13-4c83-916a-a 1cd96287e48",
   "model":"FLA-LX2",
   "name":"HUAWEI Y9 2018",
   "publicKey":"MIGfMAOGCSqGSlb3DQEBAQUAA4GNADCBiQKBgQCQhhhA7mrs6PLUXvW+MaH4c7SvPCn61LiKGnb67bW03NRrsAxblp+W7QwvWBtllz6MJIEgFTU60euMnUoEFYgX/1i+NecwpGIOCsRrxxkl35MkbQZpvaucfbrZ9clnM62NtSuenIKEySJJiN3qyZEd Ma+601yRXhTmtiOShCrwlDAQAB",
   "pushId":"cMaOcudCR7CmtqAQcwQuHP:APA91bHkp8FZIR9JXdubZhyfq8wlA-6XWrZEEmYCcOms5mw9E57DRPN3iEfSAupZqiythtgcenYo0bfuyxYp4cdQuSVoNF_sn2FUJvsgDo7HBQjuGCL8Q4_7bNKC8orzQTID5c4JM5s-",
   "signature":"TA+O+FiY50iWoAguQCJ03rlClpRnv57vodlbQABTnOrtlHe112PezMnePrXQwZsbFXdBQllP7ZYPIZvJS382AYKTHMlafH5ohoLFfCWKY+/CptAXxSy+oKqfl5zG21BROePISJBppqOoDyxsYGuluTPPn0185AIKxgON9UTAWSw="
}- JSON content extracted from the QR code
- FCM token of the device (
pushId) - Public key for the device
- Device information
Try out CIBA flow
-
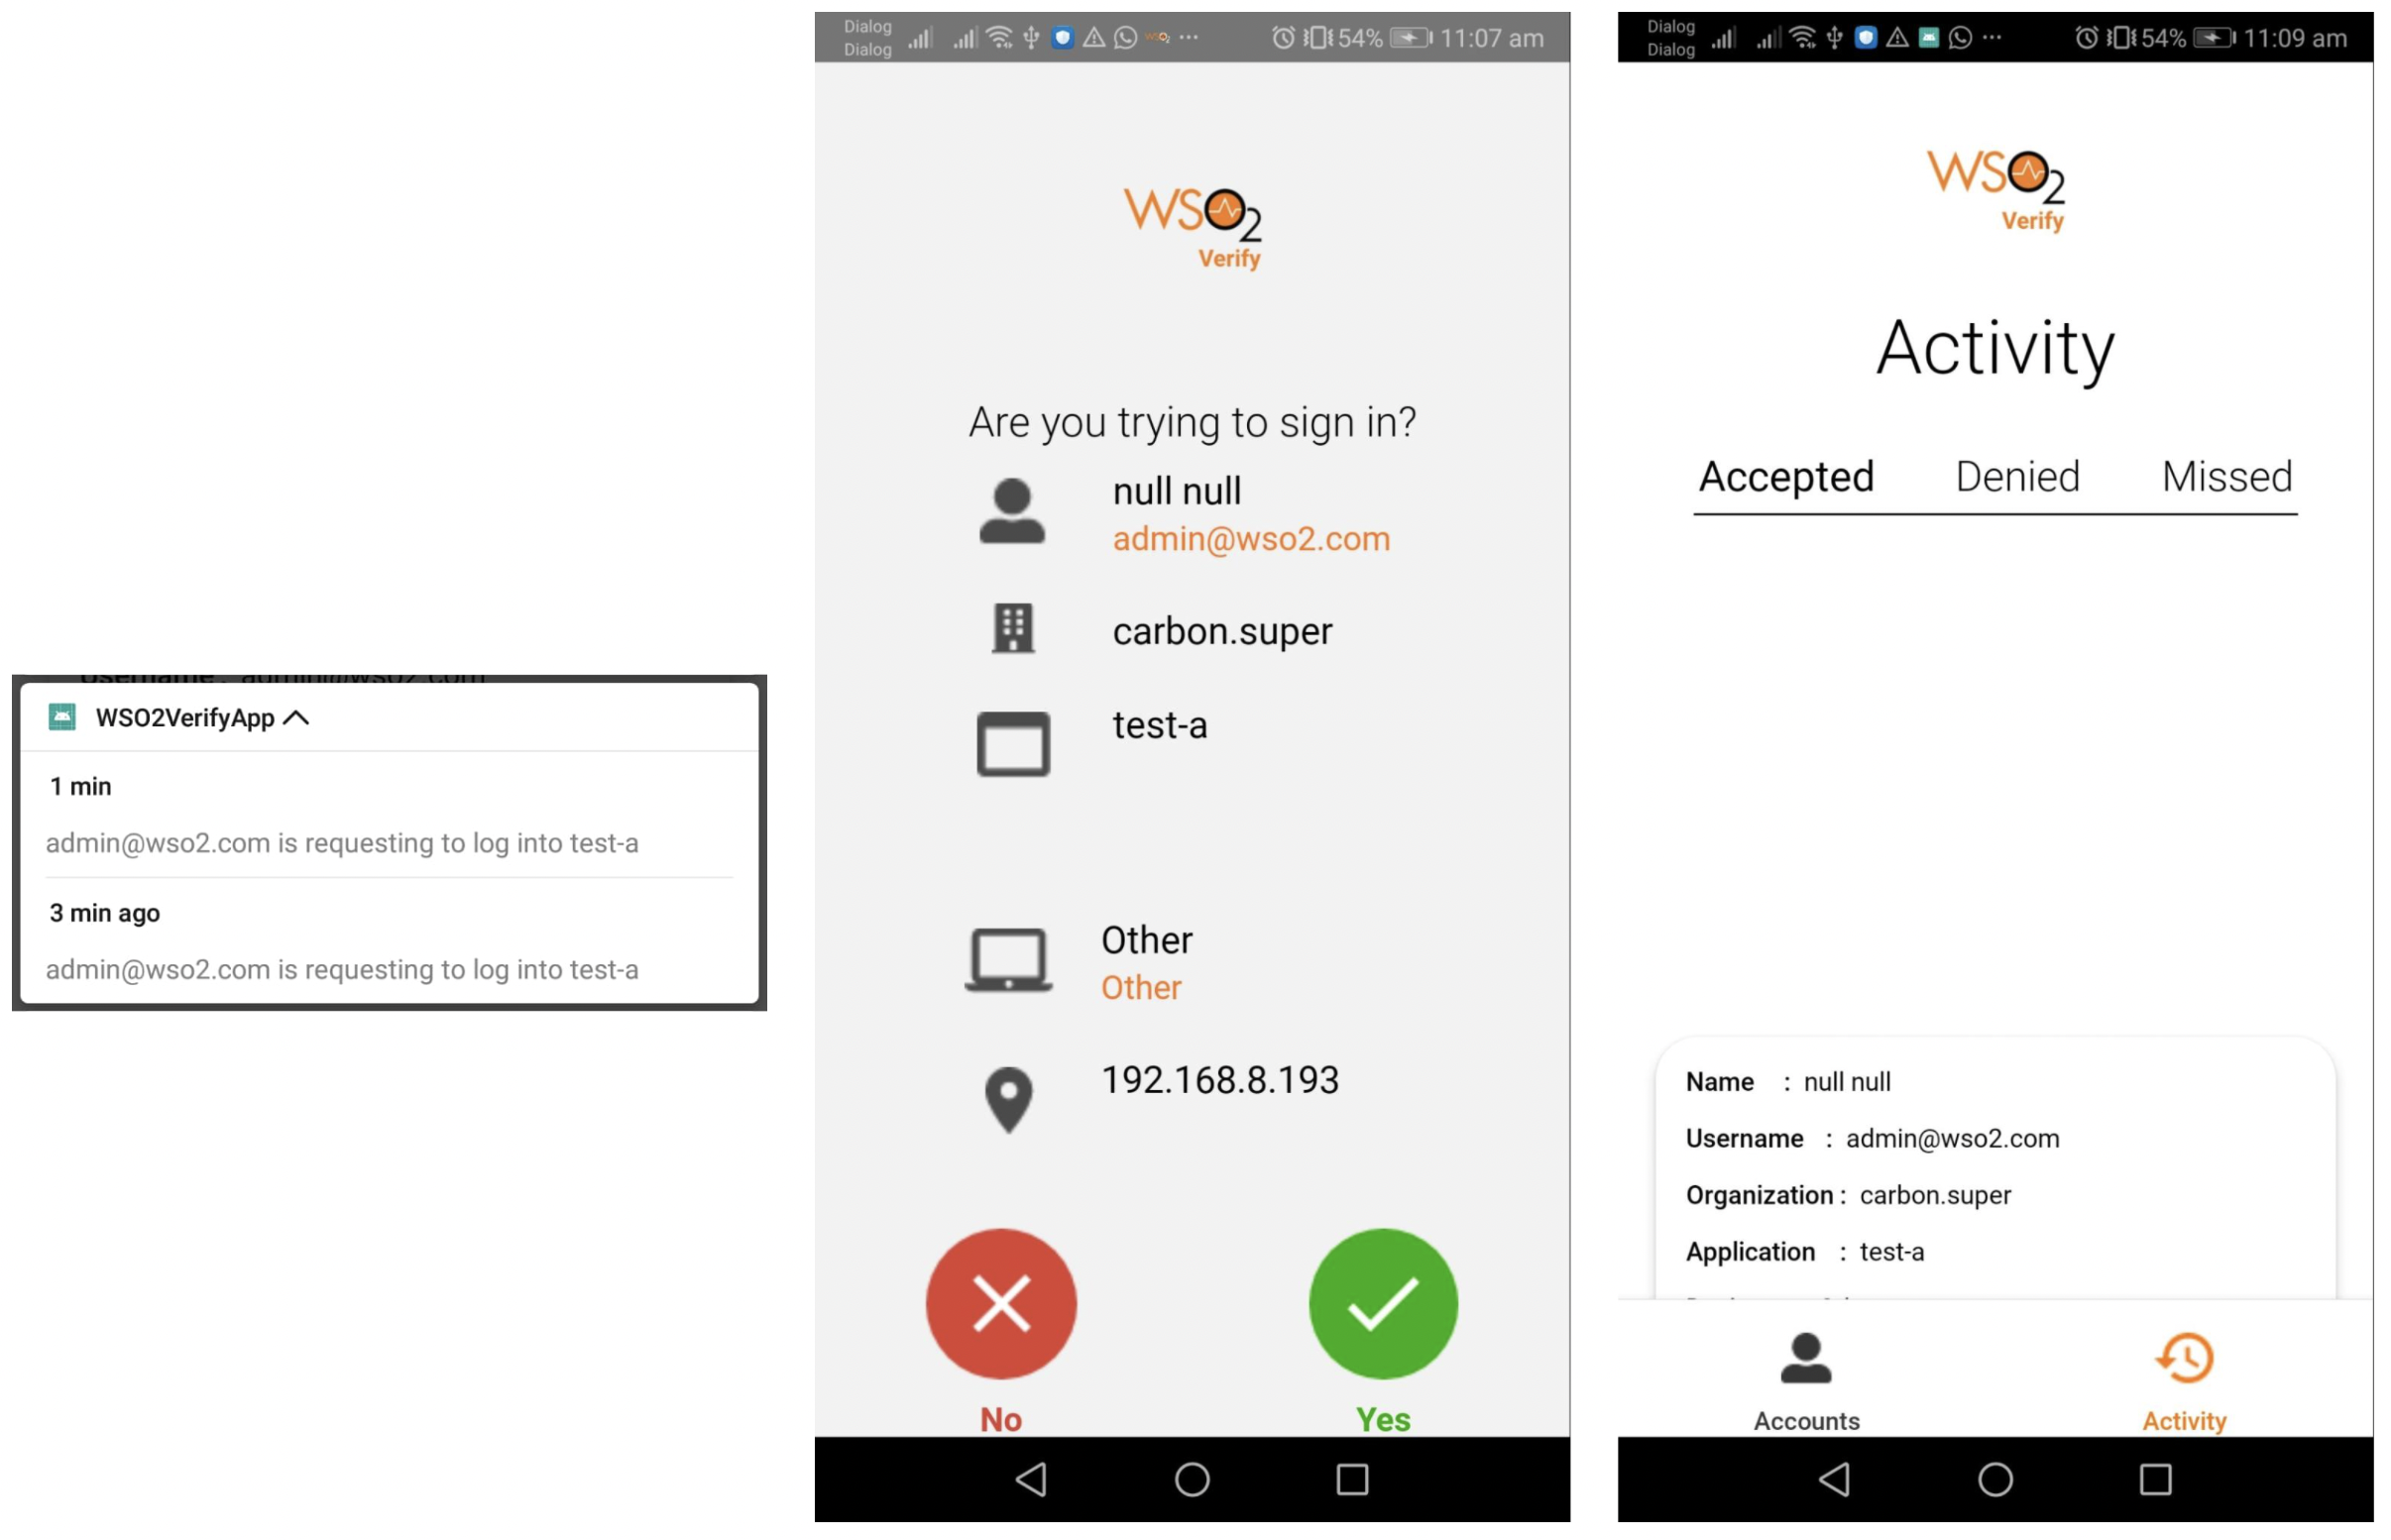
Send the CIBA authentication request to the Identity Server. Then you will receive a notification on your mobile device.
-
Once opened, the notification is displayed as a message and asks for approval.
-
The notification message contains the following:
{
   "displayName":"null null",
   "chaIlenge":"fe1091fa-b4a5-44bb-993d-7426028a51f5",
   "organization":"carbon.super",
   "deviceld":"4ce5928b-39ea-4e38-a313-f3e2f1d84c63",
   "body":"[email protected] is requesting to log into test-a",
   "username":"[email protected]",
   "browserName":"Other",
   "ipAddress":"192.168.8.193",
   "deviceName":"Other",
   "sessionDataKey":"398ec5fd-4ff3-4b42-a282-6f1c79981063",
   "applicationNam":"test-a"
}
-
-
When the approval button is clicked the following request is sent to the Identity Server as the response that the user has approved.
POST: https://192.168.8.193:9446/push-auth/authenticate headers: { Accept: "application/json", Content-Type: "application/json" } request body: { "authResponse":"eyJhbGciOiJSUz11Nils|mRpZCI6|jRjZTU5MjhiLTM5ZWEtNGUZOC1hMzEzLWYzZTJmMWQ4NGM2MyJ9.eyJqdGkiOilyMTc3NTRIYyO×ZGYWLTQ3ZjEtODQzNy1mMDcOZWJjZDEOYzIiLCJzdWliOiJhZG1pbkB3c28yLmNvbUBjYXJib24uc3VwZXIiLCJpc3MiOiJ3c28ydmVyaWZ5liwiYXVkljoiaHROcHM6Ly8xOTluMTY4LjguMTkzOjkONDYvdC9jYXJib24uc3VwZXIvliwibmJmljoxNj14MTAzNzM2LCJleHAiOjE2MjgxMDczMzYsImIhdCI6MTYyODEwMzczNiwic2|kljoiMzk4ZWM1ZmQtNGZmMy00YiQyLWEyODItNmYxYzc50TgxMDYzliwiY2hnljoiZmUxMDkxZmEtYjRhNS0ONGJiLTk5M2QtNzQyNiA yOGE1MWY1liwicmVzljoiU1VDQ0VTUOZVTCJ9.mg0HCK4qj61KW2fhNOmaredWuvUVPipI6th4S8BTd-w-J850qnKvOmnE7N-k_P_fMgkSKVq2B35Uc3_6gJ95YdIXbdxX_0LKK3veJAruOMMCJXA2fdpW_FnpyskScy08V-5whQqT-CHxvgwaifBb5YMloYJ1QktYHGDoOuVotEo" }-
The response is signed with the private key of the device. The private key is generated during the device registration. The Identity Server can decode the response as the public key is stored in the
PUSH_AUTHENTICATION_DEVICEdatabase table. -
The decoded format of the signed JWT is as follows:
{
   "jti":"217754ec-1df0-47f1-8437-f074ebcd14c2",
   "sub":"[email protected]@carbon.super",
   "iss":"wso2verify",
   "aud":"https://192.168.8.193:9446/t/carbon.super/",
   "nbf":1628103736,
   "exp":1628107336,
   "iat":1628103736,
   "sid":"398ec5fd-4f3-4b42-a282-6f1c79981063",
   "chg":"fe1091fa-b4a5-44bb-993d-7426028a51f5",
   "res":"SUCCESSFUL"
}
-